How To Transfer Dhani Wallet Balance To Bank? | Working Method
Transfer Dhani Wallet Balance To Bank
How To Transfer Dhani Wallet Balance To Bank?
Transfer Dhani Wallet Balance To Bank, Dhani Wallet To Bank, Dhani Wallet To Paytm, Dhani Cash PayTM Transfer – Hello Coolz Readers!! Here many users requested that they want to transfer their Dhani Wallet Balance in their PayTM Wallet or Bank. Get Dhani Super Saver Card Free and Get Rs.150 in your Dhani Wallet. Manage all your online payments with the Dhani wallet. Phone recharge, gas, electricity or utility payments, bus, flight or hotel bookings or any online shopping platform. Dhani is a one-stop shop for all your healthcare & financial needs.

Here we are going to share working method to Transfer Dhani Wallet Balance To Bank. This method is working and tried by us. We will keep updating new methods to transfer your dhani wallet balance in your paytm wallet or bank transfer. Read our full post below and get methods to Transfer Dhani Wallet Balance To Bank.
- Also Read : Kashware Kard Early Access Invitation
Method 1 – How To Transfer Dhani Wallet Balance To Bank? (No Broker App Rent Method) :
1. First of All Download No Broker App From Play Store.
2. Sign Up using your Mobile Number and Go to dashboard and Tap on Rent Tab.
3. Link your any physical bank where you want to receive your Money.
4. Now go to payzapp app where you all guys have an account (i guess) and there add your dhani card details.
5. Get back to No broker App and Initiate Minimum of Rs.7000 Rent on No Broker and pay using PayZapp Option. (You can add any amount of rent. if you select 7000 you will get more benefit on payzapp)
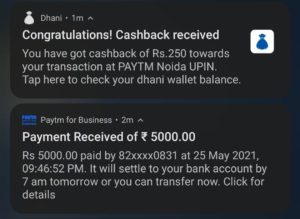
6. You will receive your payment in linked bank account and Rs.250 cashback in your Dhani if you have activated Dhani Free Super Saver Card.
7. You will Get extra Rs.350 in your PayZapp within 60 working Days if you made payment of 7000.
Method 2 – (OVER) How To Transfer Dhani Wallet Balance To Bank? (PayTM Merchant Method) :
1. First of All Open Your PayTM Merchant Account or If you don’t have any then you can use your friend’s PayTM Merchant Account.
2. Go to Payment Sources & Charges and Enable Debit Card & Credit Card Payment Option.
3. Get back to Dashboard of Merchant App and Tap on Accept Payment Option.
4. Enter Amount you want to transfer and Generate your Payment Link.
5. Send that Link to another Phone and Pay that amount using your link and pay using your Dhani Card.
6. You can use your Phone’s Kiwi Browser, CryptoTab Browser if you don’t have another device.
7. Your payment will be successful instantly.
8. Go to Merchant Account and Tap on Settlements and Tap on Settle Now Button.

9. You will get your Amount instantly in Linked Bank account in your PayTM Merchant App.
10. Many time this method gives error, so you can try it again.
The post How To Transfer Dhani Wallet Balance To Bank? | Working Method appeared first on Free Recharge Tricks-CoolzTricks Unlimited Paytm ,Free 3G 4G Tricks.

No comments
Note: only a member of this blog may post a comment.